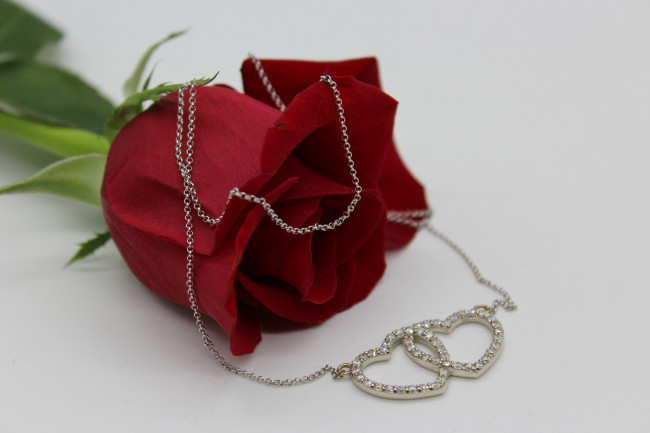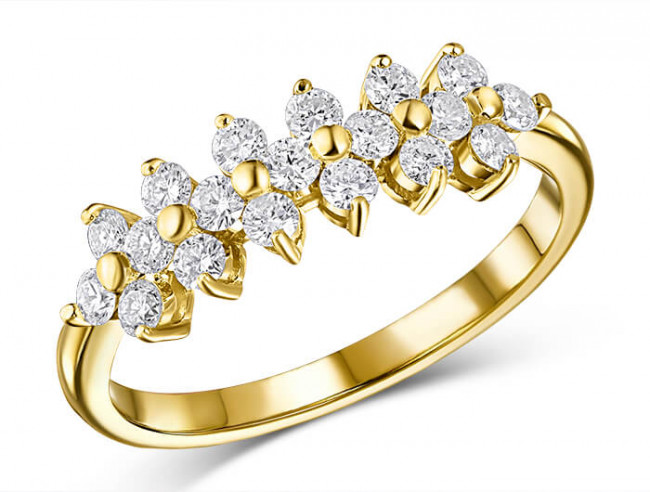
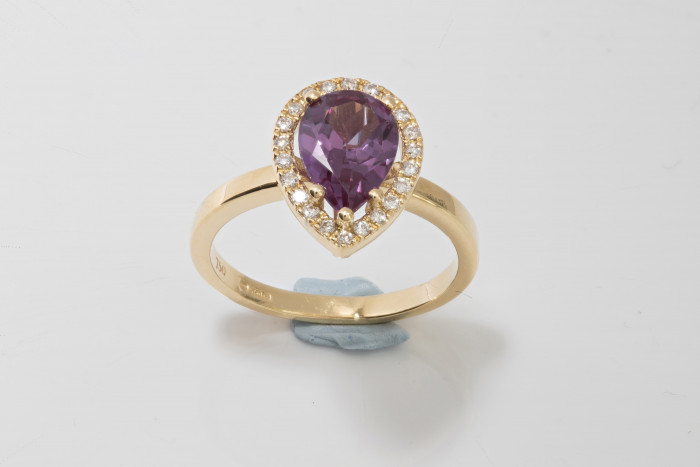
Jewelry photography demands precision and perfection, especially when it comes to showcasing the brilliance of fine jewelry. The intricate details, the luster of the metal, and the sparkle of gemstones must all be captured in their best light. However, even with the best camera and lighting, raw images may not always do justice to the piece. That’s where jewelry retouching comes in—a crucial step in enhancing shine, color, and clarity to produce breathtaking images. In this blog, we’ll explore the key techniques and tools used in jewelry retouching, helping you transform ordinary photos into extraordinary ones.
Understanding the Importance of Jewelry Retouching
Jewelry photo editing is not just about correcting flaws; it's about elevating the image to a level where the product looks its absolute best. Whether you are preparing images for an e-commerce website, a catalog, or an advertisement, high-quality visuals are non-negotiable. Jewelry pieces, especially those adorned with gemstones, require careful attention to detail to ensure that every facet is highlighted. The goal is to create images that are not only accurate but also visually stunning, capturing the viewer's attention instantly.
Tools of the Trade: Essential Software for Jewelry Retouching
Before diving into specific techniques, it's important to know the tools that make jewelry retouching possible. Adobe Photoshop remains the industry standard, offering a range of features designed specifically for photo retouching. Tools like the Healing Brush, Clone Stamp, and Dodge & Burn are invaluable for refining details. Additionally, Adobe Lightroom can be used for initial color correction and exposure adjustments, making it easier to work on the finer details later in Photoshop.
Enhancing Shine: Bringing Out the Luster in Metals
One of the key aspects of jewelry retouching is enhancing the shine of metals like gold, silver, and platinum. To achieve this, start by cleaning up any imperfections using the Healing Brush or Spot Healing Tool. Once the surface is smooth, use the Dodge Tool to selectively lighten areas where you want to enhance the shine. Be careful not to overdo it—shine should look natural, not exaggerated. The goal is to mimic the way light interacts with the metal, creating a realistic and appealing luster.
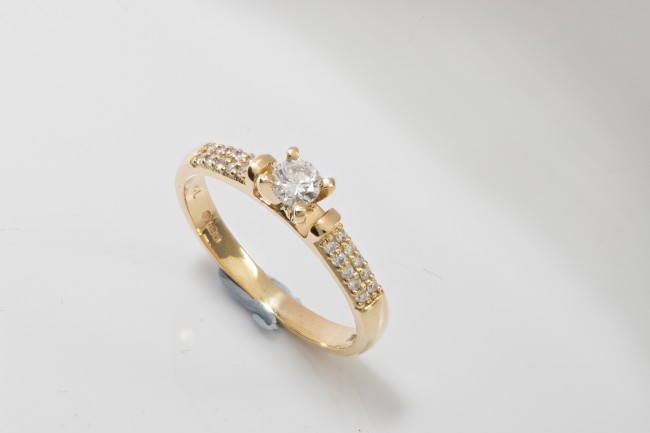
Perfecting Color: Making Gemstones Pop
Gemstones are the focal point of many jewelry pieces, and getting their color just right is essential. Start with a basic color correction using the Hue/Saturation adjustment layer in Photoshop. This allows you to tweak the color balance and saturation to make the gemstone’s natural color stand out. For more precise control, use the Selective Color adjustment layer, where you can adjust individual color channels to achieve the perfect hue.
After color correction, consider enhancing the vibrancy of the gemstone. The Vibrance adjustment layer is useful here, as it increases the saturation of less saturated colors more than those that are already vibrant, preventing an overly processed look. The goal is to make the gemstone appear rich and vivid, without crossing into the realm of unnatural colors.
Boosting Clarity: Ensuring Every Detail is Sharp
Clarity is crucial in jewelry photography, where even the smallest detail can make a big difference. To enhance clarity, start by sharpening the image using the Unsharp Mask filter in Photoshop. This tool increases the contrast along the edges of details, making them appear sharper. However, it’s important to use this tool judiciously to avoid introducing noise or halos around edges.
For a more refined approach, consider using the High Pass filter. Duplicate your image layer, apply the High Pass filter, and set the blending mode to Overlay or Soft Light. This method enhances the edges and details without affecting the overall softness of the image, providing a crisp and clean finish.
Correcting Reflections: Polishing the Surface
Reflections are a common issue in jewelry photography, especially on highly reflective surfaces like metals and gemstones. While some reflections add to the realism of the image, unwanted reflections can distract from the piece’s beauty. To correct these, use the Clone Stamp tool to remove harsh or distracting reflections. Be sure to sample from nearby areas to maintain the texture and tone consistency.
If reflections are particularly problematic, consider creating a separate layer for the affected area and apply a Gaussian Blur. This will soften the reflection without losing the overall shape of the jewelry. The key is to strike a balance between realism and aesthetic appeal.
Adjusting Lighting and Shadows: Creating Depth and Dimension
Lighting plays a significant role in jewelry photography, as it defines the shape and form of the piece. However, not every photo is captured under perfect lighting conditions. Retouching allows you to enhance the lighting and shadows to create a more three-dimensional look. Use the Dodge and Burn tools to selectively lighten or darken areas, adding depth and dimension to the piece.
Additionally, consider using the Curves adjustment layer to fine-tune the overall contrast of the image. By adjusting the curve, you can control the highlights and shadows, ensuring that the jewelry stands out against the background while maintaining its natural look.
Removing Background Distractions: Focusing on the Jewelry
A clean, distraction-free background is essential for jewelry photography, allowing the focus to remain on the piece itself. If the original background is not ideal, you can easily remove or replace it in Photoshop. The Pen Tool is particularly useful for creating precise selections around the jewelry, allowing you to isolate it from the background.
Once the jewelry is isolated, you can place it on a solid color background or a gradient that complements the piece. Be sure to adjust the lighting and shadows to match the new background, ensuring a seamless and natural look.
Final Touches: Polishing the Image for Perfection
After applying all the major retouching cloud techniques, it’s time to add the final touches. Zoom in and inspect the image at 100% to catch any small imperfections that may have been missed earlier. Use the Healing Brush or Clone Stamp tool to fix these minor issues. Additionally, consider applying a subtle vignette to draw attention to the center of the image, where the jewelry is located.
Finally, save your work in a high-resolution format, ensuring that all the details and quality are preserved. If the image is intended for online use, consider exporting a web-optimized version as well, with appropriate file sizes and formats.
Conclusion: Elevating Jewelry Photography with Expert Retouching
Jewelry retouching is an art that requires a keen eye for detail and a mastery of photo editing tools. By enhancing the shine, color, and clarity of your jewelry images, you can create visuals that not only capture the essence of the piece but also leave a lasting impression on viewers. Whether you're a professional photographer or a jewelry brand looking to elevate your online presence, investing time and effort into jewelry retouching will undoubtedly pay off in the form of stunning, high-quality images.