It doesn't have to be difficult to set up your new wireless router!
If your modem includes a built-in router, you can focus solely on connecting rather than having to purchase and set up a separate router. To use your new wireless internet, follow the instructions in this article step-by-step as you connect the necessary gear, set up your router, and connect and prepare your devices.
The foundation of your home network is the router. You'll be able to access and modify your Wi-Fi settings after wifi router configuration. Your router will be securely connected to the internet, your information will be shielded from prying eyes, and your children will be prevented from viewing inappropriate content if it is configured properly.
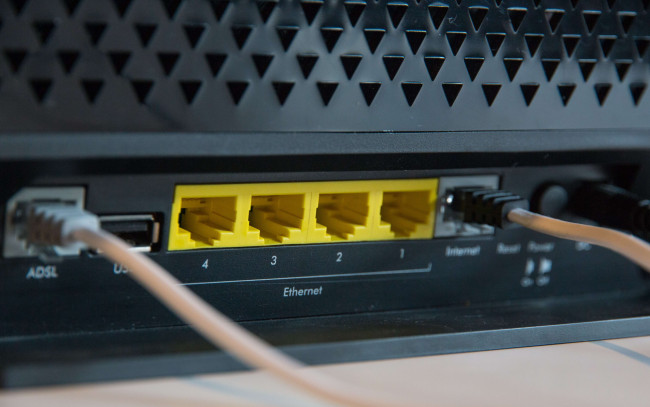
Step 1. Connecting the router to your modem
Link your modem and router together. You can link many devices to your broadband internet connection using wireless routers. You will need to connect the router to the modem if your internet provider does not provide you with a router/modem combo device. Place your router close to your modem for the greatest results. You will see the configuration of wifi router is more than easy.
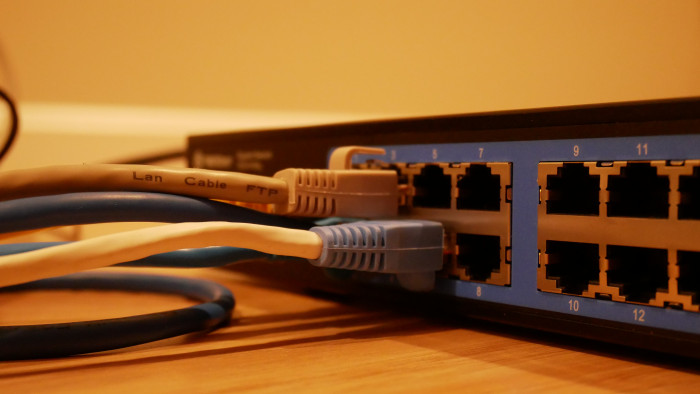
An Ethernet cable should have one end plugged into the LAN port on the modem and the other end into the WAN port on your router. You can utilize the brief Ethernet wire that most routers ship with for this.
Make sure you acquire the router you need by comparing features because routers come in a variety of sizes and styles. You'll need a router that allows you to upgrade the antenna(s) with high gain types, if not already included in the package if you need to cover a larger area or have many walls in your home. A MiMo-style router is advised if multiple wireless devices will be connecting simultaneously at various speeds; otherwise, the speed for all devices will decrease to the highest supported by all at that moment.
Step 2. Using Ethernet cable
Ethernet cables can be used to link the router and computer together. You must attach an Ethernet cable to your computer's LAN/ethernet port and the LAN port on your router in order to complete the setup process. Any device linked to the router's LAN ports or WiFi signal will receive a local, or "private," IP address from a pool of private addresses.
Step 3. Finding IP address
Find the router's IP address. Locate the default IP address, which may be printed on a label on the router or in the paperwork if this is a new installation or router. If you are having trouble finding the router's IP address, you can check the default address online by performing a search for the router model.
Step 4. Opening a web address and going to the IP address
Go to your router's IP address with a PC web browser. In the address bar, type the router's IP address and hit Enter. The setup menu of the router will make an attempt to connect with your browser.
If you're having trouble determining the right IP address, username, or password, look up the router model online to find the default login. If it has been altered, press the Reset button on the router's back for 10 (to 30+) seconds as specified in the router model's instructions, then try again.
Step 5. Change the Password
For customizing their routers, many router manufacturers offer smartphone applications. If your new router has one, use it (in some cases, that might be the only way you can configure the router). Utilize an Ethernet cable to connect your PC to the router if there isn't an app or if you'd rather use the browser-based user interface. In the address bar of your web browser, type the router's IP address and press Enter. The IP address of the router may be printed on the device itself; it will likely appear something like 192.168.1.1.
Step 6. Firmware updates for routers
After the router has been delivered, router manufacturers frequently update fresh firmware. Make sure you have the most recent version of the firmware at all times because it could include important bug fixes as well as security and performance enhancements. The majority of routers will perform a firmware check, although few do so automatically; you usually need to at the very least press a button on the router's settings software. For more information, consult the router's documentation. After a firmware update, the router needs to be restarted.
Step 7. Change the Wifi password and have fun
Some routers have a pre-set Wi-Fi password when they leave the factory (they might even put it on a label on the router itself). When you first set up the router, many others will at the very least prompt you to create one. Make sure the router is set up to use at least WPA2 encryption.
Wifi configurations are easy when you are a professional instructions follower.
Q&A's
Q: Do I need to purchase a separate router if my modem includes a built-in router?
A: No, you don't need to purchase a separate router if your modem includes a built-in router.
Q: What should I do if I can't find my router's IP address?
A: If you can't find your router's IP address, you can check the default address online by performing a search for the router model.
Q: Why is it important to update the router's firmware?
A: It's important to update the router's firmware because it could include important bug fixes as well as security and performance enhancements.
Conclusion
Setting up a new wireless router can seem intimidating, but following the steps outlined in this guide can make it an easy and straightforward process. Connecting your router to your modem, finding the router's IP address, changing the password, and updating the firmware are all important steps to ensure that your home network is secure and functioning properly. With these simple steps, you can enjoy fast and reliable Wi-Fi throughout your home.